Showing posts with label Battle Report. Show all posts

Friday, June 11, 2021

Battle Report: Last Days, Old West - Calhoon Clan VS Jay's Baddies


In the Old West, the dead don’t rest easy…

Been a while since I’ve had a chance to play something and it’s going to be Last Days again. With Jay. Again. BUT! We decided to try out the Old West rules from BLASTER Volume 1.

For this game, I brought a group I call the Calhoon Clan (based on the Ferner Five, the Deadlands posse of legend). Let’s take a quick look at who we have and what they’re packing:

Nona “Cookie” Calhoon (Leader, Selfless), armed with a LeMat and knife.
Phil Calhoon, Fire Fighter, armed with an axe and revolver.
Dr. Ashleigh “Penny” Penwood, a Sawbones, with a magnum and “heavy blade.”
Running Bear, a Survivor, with a bow, tomahawk, and a spear.
Little White Dove, another Survivor, also with bow, tomahawk, and spear.
Victoria, a Gunfighter, with a pair of sixguns and knife. 


For Jay, he made a list with:

Selfish Leader with LeMat and Heavy Blade, Soldier with hunting rifle and spear, Goon with shotgun and heavy club, Tough Guy with revolver and club, Gang Member with a knife, and a dog. (no one had a name as he made it here after he got here.)


When it came to setting up the game, we decided to throw down a mix of my stuff and his, not even bothering to roll for deployment, just using the edges we were sitting closest to. I deployed with a split force, Phil, Nona, and Penny set up near a bridge in cover, while Running Bear, White Dove, and Victoria were on the board edge. Jay also split up his forces but not as far apart as mine were.

Once we had everyone on the board, we slapped down my three Reaper Zombie Miners. Jay had really good rolls early on, winning placement, first turn initiative, and the like. I was behind from the start.

As the game progressed, my forces got waylaid by zombies. Little Running Bear, White Dove, and Victoria were locked down on and off in the early game because of zombies. In addition, due to Phil blocking the bridge while trying to put down his zombie, Nona and Penwood had to slog through the water.

Meanwhile, Jay had free rein to go after the tokens and do what he wanted. He was able to get rid of his zombie problem as easily as I did but he was in better position than I was, with his crew.

Things came to a head when he decided to switch from going for the tokens to trying to take me down. I lost Victoria, then Running Bear, and then Phil. After I lost Phil, I started going after him. One of the more interesting moments was when Jay’s dog charged Penny and Nona. We had a bit of a heated debate, as he pointed out that there was no direct rule against it, and I was of the opinion that it shouldn’t be allowed because it normally isn’t in other games. We agreed to let it go in his favor but I posted in the Facebook group. I’m yet to get a large response to it. Anyway. While this did allow him to lock them up in close combat, it also prevented him from shooting them. I did manage to take out the guy who killed Phil, and two others of his crew. So, we had both lost three members and started having to roll for Breaking. He lost.


So, it was a slight victory for me. Could I have won in the end? Maybe. Jay’s rifleman was locking me down really hard but I did have Nona out there, with her shot tube still loaded. And, while both of our rolls were terrible at the start of the game, mine were starting to get better as the game went on. It was really anyone’s game at the end. 

And that’s where we’re at. It was a fun game and I think we really liked how it went. We did discuss some changes to the Break Tests for one-off games and we’re talking about doing a campaign in the future, after we have the rules down better. Keep your eyes out for it...


Friday, September 25, 2020

Battle Report: Last Days - The Screw You Gang VS Jay's Crew

Are you ready for some zombies? Because I finally got a real game of Last Days in, with another person, and boy was it wild. Buckle up!

The Crews:

For this game, I brought my Screw You Gang: (which was featured in my first solo game).

Velma (Leader) armed with a chainsaw and magnum

Daphne (Survivalist) armed with a SAW and a knife

Fred (Tough Guy) armed with a semi-auto and heavy blade

Shaggy (Tough Guy) armed with a pump action shotgun and heavy club

Scary Doo (Dog)


And Jay's Crew:

I don't completely remember what all he had, but I do remember that his boss had a shotgun, Sarge was a Sarge character with a High Powered Rifle, he also had a Dog, two Gang Members he called the Safety Twins (one of with had a shotgun), and one other guy. Sorry, but he didn't email me his list.


Set-Up and Deployment:

For this game, Jay brought a lot of terrain and I provided a little bit. We had two building that we could enter and set them up across from each other with a bunch of barricades and vehicles in between them, as well as my little pond.

With that done, we put the Salvage Tokens out like you're suppose to, with one ending up in the house.

After that, I we did deployment. I know, we kind of messed that up. So, I set up in cover, as I didn't want to get shot off the board in the first turn. I, once again, split up with Daphne and Fred behind the diner and Shaggy, Velma, and Scary behind the APC. Jay deployed his group with Sarge and this boss behind the house and the rest of his force kind of spread out along the edge, mostly in view.

Once we got set up, we then put out the zombies. We learned something with that, let me tell you.


The Game:

During the first Menace Phase, Jay was getting stared down by the zombies. They didn't reach him right away but he had to focus on them right quick. Meanwhile, I won initiative and chose to be the Aggressor. I started slowly moving my group up to the diner and around the APC, and Jay started moving into the house and towards some of the Salvage Tokens. After that, Jay took some potshots at some zombies while I decided to hold off of firing.


During the next Menace phase, Jay gets swarmed. He gets a few from Noise Tokens and the ones that are already out there are getting in his face. I won initiative again (I'll keep doing this through out the game) and again chose to be the Aggressor. I start having Daphne climb up the diner, Fred comes out from behind the diner, Shaggy, Velma, and Scary come out into the open. Meanwhile, Jay has gotten Sarge up into the attic of the house and continues to zip around, moving his dog in front of the diner. During the shooting phase, I find out Sarge is armed with a high powered rifle. I mean, find out the fun way...


After this, things get a little hazy, so you'll have to bear with me. Sarge takes out Shaggy, in one shot, and goes Locked And Loaded later. Velma ends up taking out Sarge with her Magnum, ending that threat. Most of Jay's crew is stuck not far from his deployment zone, trying to break off from the zombies, and collects a Salvage Token. Jay's dog engages Fred and takes out a bite. Next turn, Fred rolls a 6 for damage and makes him into dog meat.

What changed the whole game was Daphne. She gets up to the roof of the diner and gets close to the edge. And then starts the hail of bullets. With her position and the terrain, she's got almost the whole board locked down. Jay now had to work around her and I was able to press him. Fred got taken out, as did Scary. For Jay, I took out two of his other goons and it was getting hard for him to do anything. He lost his Salvage Token because I took out the guy who was carrying it, right by the board edge. His leader had to kick a zombie off of him and then fell back into the house. While Daphne could see him, I decided to give him a break and agreed that he couldn't be shot.


And then we got to the Break rolls... 


Results:

With both of us down by three members, and him having one more than I, it was really close. But, he Broke and I didn't. I ended up winning and collecting all of the tokens. Thankfully, this was just a one-off game so it won't matter in the long run. It was really a chance to learn about the game.


What did we learn? Well, we weren't putting out enough Noise Tokens, and as such, there weren't nearly enough zombies. One thing that made a huge difference was us screwing up the climbing rules. In most of the other games I've played, your models can “hang out” between turns and complete a climb as long as it takes. If we had been doing everything right, I wouldn't have been able to get on top of the diner. However, I'm going to be making some ladders... There were a few other minor things (forgetting when to roll Courage/Horror checks, etc) but we did a pretty good job of getting the rules down.


While I do like winning, it was a very close game. If I hadn't taken out Sarge as quickly as I did, I would have been screwed. If I had rolled poorly with my Noise Tokens, I could have been easily swarmed by zombies. If Jay had rolled better in the Shooting phases, he wouldn't have been as slowed down and able to get more tokens. Until the last turn or two, it really felt like it could have gone either way. 


Jay and I have agreed to try playing some more one-off games before starting a campaign. And after that campaign, we might run a Seasons campaign. So, stay tuned.


Friday, August 21, 2020

Battle Report: Perilous Tales: The B-Team vs Imhotep

Preamble:
Five women, highly trained and highly motivated, set out to discover the cause of the disappearance of a archaeological dig team in the deserts of Egypt. What they find may be one of the greatest threats they've ever faced!

Heroes:
I call this team “The B-Team” using models from Reaper, the “we closely resemble but are legally distinct from” the movie SuckerPunch. I'm using different names but if you want to find them, they're under the Chronoscope line, listed under “Anime Heroine” and “Survivor.”
Barbie – Leader
Traits: Discretion, Sneaky
Bambi
Trait: Marksman
Becky
Trait: Crackshot
Bai
Trait: Lucky
Bobbi
Trait: Medic

Villain:
The Mummy -
Master: Imhotep
Minion (Unique): High Priest of Karnak
Minions: Cultists of Karnak


Set-up:
The Desert Dig Site -
Quicksand (Unsteady)
Blazing Heat (Creeping Horror)
Sand Storm (Raging Storm)

When it came to setting up the board, I might have gone overboard (haha, unintentional pun there). I wanted it to look like something out in the desert with some large holes to represent the pit that would have been dug to discover the tomb. I also used some stuff to represent the ruins that would have been around it as best I could. Next time, maybe a bit less terrain is in order...
I also rolled Aggressive for the deployment of the Threat Tokens, which was a little hard with what I had out.


Objectives:
Stop The Ritual – This required an altar or something like that, so I grabbed the one I got from the first Bones Kickstarter. I had real trouble placing it as it says you're suppose to in the rules. With the requirements for both it and the tokens, it was literally impossible.
Set The Explosives – With how much terrain I had, this one was going to be easy. Provided I could actually get to the other side of the board!
Escape – I didn't score a single point from this one but it is a nice one to have, as you can use it to score points from wounded models.


The Game:

I deployed the team kind of near the middle, as my goal was to drive for the middle of the board (for the Altar), some terrain (for explosives), and get the hell out of Dodge! As we all know, that was a fools game...


Once the game started, I tried to send Becky off on her own, down a kind of alley, while the rest of the team advanced together. Of course, Becky got close enough to trigger a Cultist and got tied up for the first few rounds. I had to divert Bobbi to help her out and then heal her.
As I tried to advance, I got screwed. Hard. Without the lube. I managed to trigger ALL of the environmental effects, one right after the other, thanks to the successes rolled during the start of the Villainous phases. Then, I brought out Imhotep! He thought Barbie was his Dearly Beloved and then started kicking on Bai, who ended up having to take on another Cultist as well!


So, I had to throw Bambi in to back up Bai, and then had Becky and Bobbi run in after they cleared out the other Cultist. Along the way, I had to have Bobbi heal Becky really quick, and then try to heal Bai as much as she could, which might not have been entirely correct in the rules (it doesn't say you can't heal someone who's Engaged in combat, which might be something to think about moving forward, I'd say “no” if it were me).
Meanwhile, I had Barbie running around and trying to score points. Which was the plan from the get-to, but I didn't like how she was pretty much running around by herself with the Priest out there somewhere. Given how poorly I rolled, I was very glad I didn't have him pop up. Then again, since she was the Princess, she actually would have been fine... Hmm...


By the end of the game, I had a huge snarl in the middle of the board. Imhotep and the Cultist kept trying to smack Bai and missing, while Bai and everyone else kept trying to smack them and kept missing. It was a real comedy of errors, let me tell you. Even with the high skill of Imhotep, I kept rolling tens on the Difficulty dice. At one point, I rolled three tens, one on each die. I still don't know how that should have worked, but since it was the hero rolling, I counted that as two successes. As the rule states that the hero needs to “meet or beat” the difficulty. I rolled two Difficulty dice because I had Advantage, in case you're wondering.


The fight ended when Barbie came back from dealing with the Altar and placing some explosives. Then, she joined the brawl in the middle and whittled Imhotep down. If she had kept moving around, I would have triggered the last two Threat Markers and it would have been bad.


Of course, after I killed the Cultist, I realized that the game should have ended three turns ago...
I do have to say that I'm kind of confused about some of the rules. Like, how can you get more than two successes? There's several areas (including the Threat Check Results table) that goes well past the two you can get on a ten. From what I've read, it appears that you get a pass/fail results for successful rules, except when you roll a ten. Should there be a success for each number better the goal and the roll? I'm not sure...
So, with Imhotep and the two revealed Cultist dead, the Altar dealt with, and three explosives placed, I called the game.


Results:
Rank – C
I barely survived, just by the skin of my teeth. I made a lot of mistakes, which both helped and hurt me, but I had real feeling that I was screwed no matter what I did. With the range Markers are activated, and move when you roll the success on the test at the start of Villainous Phase, you're going to be swamped really, really fast. Next time around, I'm going to go for easier objectives and just rush for those.
The one thing that really gets me is how far things have range on such a small table. Threat Markers can be triggered 6” away and, when you roll the most common results on the Threat Check, you're almost always going to have SOMEONE within 10”. When you're racing against the clock, it's like the game is designed to end up with a mess in the middle of the table, which you don't even want to bother to escape because the villains are going to move 6” at a time, towards your heroes, making you choose between duking it out and just running away until time runs out. It just feels slightly off.
All of that said, I do plan on playing it again soon and I'm holding off on a firm verdict until then. So far, it's not terrible and is fun, but it's a slog, no two ways about it.

Friday, July 24, 2020

Battle Report: Last Days: Zombie Apocalypse - Solo game #1

Welcome to my first Last Days: Zombie Apocalypse battle report and my first battle report in a very, very long time. Hopefully I remember how to do this...

Forces:
For this game, I ended up picking my HassleFree minis “closely resemble but are legally distinct” Scooby Doo group. Originally released by in 2012 (if I remember correctly), these are the “post apocalyptic” versions they made. Sadly, I wasn't able to get the Scooby mini and ended up with the minigun version of Daphne. I also really want to track down a Mystery Machine...
Ahem. The forces. Due to the rules, I ended up making a Selfish force, as follows-

Fred (tough guy, neutral) armed with semi-auto pistol and a heavy blade
Daphne (survivalist, selfish) armed with a SAW and a knife.
Velma (leader, selfish) armed with a chainsaw and magnum pistol.
Scary Doo (dog, neutral)
Shaggy (tough guy, neutral) armed with a pump-action shotgun and a heavy club

Their Refuge is a Mall. Since I don't have to worry about competing against another player, I can spend all my Scavenge Points on Perks and just have some fun.

Mission -
Set-Up/Terrain:

As per the rules laid out in the book, I used a few vehicles to create a group of car wrecks in the middle of a crossroads, using some cars and trucks I've picked up. I then put down some ruins, barricades, barrels, and some other bits. I didn't use any difficult terrain because I didn't want to have one more thing I'd forget while playing. And I felt like I had more than enough terrain on the table.
After that, I set up five zombies in the middle of the board (using some Torn from SpineSpur so I could tell them apart from the ones that would be spawning). After that, I set up my own survivors, splitting up the group just like they do in the old show. Fred and Daphne to one side; Velma, Shaggy, and “Scary Doo” off to the other. I didn't want to have too much distance between the two groups, but I also knew that it was better to make sure that one wouldn't be sending zombies after the other.
The last part of the set up was the other group of zombies. When you're playing solo, you place zombies equal to the level of the group you're playing. so you're going to be dealing with more and more as the campaign advances. That's going to be fun... Not. These zombies replace the other player's group in missions.


The Game:
The first turn was pretty mellow, the zombies advanced towards the survivors. I was a little worried that I'd get swamped right away, but I far enough back to have the distance I needed. I then moved my forces forward, getting Scary up front and engaged. That was the whole point of him. He could move ahead of everyone else and doesn't suffer from a penalty when engaged by a group. Since most of the group was lugging several pieces of Heavy gear, I had to be careful. I made sure to position everyone else carefully, so they could open up on different zombies.
Which is what they did. While my dice were good most of the game, they weren't doing great at the start. I got in some hits and took out one or two. Those dropped the Supply Tokens I needed. I sent out Shaggy and Fred to grab them, as Velma was already moving slowly and Scary couldn't. That was fine, it allowed me to keep them mobile and have them cover the ones with the Tokens. 


After the second turn saw a few more zombies pop up on my rear. Between the Chainsaw and SAW, plus having Scary Doo, I was generating a few Noise Tokens. Since the closest board edge was behind me, that meant that I ended up with quite the little group coming up from the rear. However, I was able to clear off the zombies I had started with without too much trouble. I did have to shuffle the Tokens around, to keep things moving.

As the game went on, Scary was always in the fray. Since dogs don't take penalties for taking on multiple enemies, I kept him moving towards every fight he could. Velma kept getting caught in combat because of how slow she was moving. While she was able to cut down zombies with ease, she would have another one jump into a fight. Daphne had something of a similar problem. The SAW was great at cutting down zombies from a distance but was generating just enough zombies to hamper the other half of the team. I also had to make sure that Shaggy and Fred opened fire first, as Selfish models target the zombie closest to them, so I could work on thinning the ranks. Scary was really the MVP of this game. When I would get a group of zombies built up, he was always there. Sure, he didn't have the greatest CQC stat nor did he have a bonus to the Lobo rolls but I'll be damned if he didn't take down more than anyone else. It's a shame I can't level him up because he deserves it. Fred did alright, mostly doing cover for Daphne and hauling around a Supply Token. Shaggy was also good at moving and recovering things. And, when he was in combat, he used his axe very effectively.


I was really lucky with the End Phase events rolls. Only twice did have a car alarm go off and had one Supply Token get back up as a zombie. I did stop rolling it during the last two turns because I was getting a little frustrated and wanted to get on with my night! Besides, I knew that was soon as I was about to finish, I'd get something really bad...


As things started to wind down, I only had two zombies left. One was about to be surrounded by Velma, Shaggy, and Scary; and the other would have easily been gunned down by Fred and Daphne. So, I called the game there. I also said that I eliminated all of the zombies and got to collect all of the Supply Tokens. Hey, my board, my rules. I only had to fudge one other roll, because it wasn't quite cocked but I needed anything besides the 1 I rolled.


What I learned from playing this game:
Oh boy, there were a lot of missed rules and things I read incorrectly the first time. And I made several mistakes at first. I had the zombies with Supply Tokens moving at full speed at first, which was mixed. It meant that I didn't have to work as hard to get them. I also messed up and thought they were Heavy 1, not Heavy 2. I also had Shaggy hauling two them around for a while. Oops. I also couldn't find the rule about car alarms (page numbers are really nice, people) so I just said it was like a Noise Maker item, since I could find that easily.
That's one thing I can't stress enough: This book needs to be cleaned up, badly. You have to jump from page to page to page to find the cost, stats, and then special rules for equipment and models and etc. There's also a huge problem with things having several different names in different parts of the books. I'm already working on reference sheets I'm going to type up and print out.


The Post Game Results:
When everything was said and done, I made out like a bandit. Everyone that could gained a level. I got some okay rolls for my loot. I did end up with three Hunting Rifles. I didn't get the minigun (it'll happen, I know it will).
I didn't have to modify my rolls too much when it came to leveling everyone up. I had Velma roll on the Characteristics table, as I really want to get her some AP, but she got another point of CQC. Which is absolutely fine. I had everyone else roll of skill tables. Shaggy got Heavy Lifter, which gave me a chuckle. Daphne got Quick Load, which was another thing that was pretty good. And Fred got Gear Head. So... Yeah, the dice really loved me this time around. Maybe it was the blessing of Scooby Doo? I don't know.
Since I ended up with a good stash of Scavenge Points, I had Fred build a Fenced-Off Garden, so I could get some more Salvage Points as the game advanced. I had everyone else go on Guard duty so I didn't have to worry about a Zombie Attack. Well, also most everyone... Since I had enough points, I decided that the Gang needed someone to help carry things and kill zombies. Who? Well, you'll have to find out next time!


Saturday, September 23, 2017

SpineSpur: Hack Dies At The End

Well, look at that, I'm playing SpineSpur again. Been a while... Too long a while since I've done that. But between losing the store I used to play at and slipping a disc in my back a few years ago, I haven't really had the place or energy to play the game, much less work on the minis. That's going to change pretty soon. Enough of my bullshit, time for the battlereport.

First off, there's no pictures because I didn't know if the game was actually going to happen and I didn't feel like stopping to snap them while we were playing.
It was another "teaching game," this time with my friend Phoenix and another member of my RPG group, Joe. The lists are some you're probably familiar with if you've read my battlereports before. That's not going to stop me from posting the lists again:

GOD: 100 points (Played by Phoenix)
Aniel
Warriors of GOD
Fists of GOD

Hack & Amy's Murder Party: 101 points (Played by Joe)
Hack
Amy Brighteyes
Thug: Molotov (x2)
Thug: Bludgeoning (x2)

Greygun's Angels: 100 (Played by your faithful author, Captain Pete)
Greygun
Dante Hayte
Booth
Thugs: Blades (x3)

Since we were doing a multiplayer game, we again went for the Kill The Head Scenario in the Shitlands, using my amazingly durable sewer board. To make things easy, I didn't bring any terrain and we just deployed in a corner. Phoenix won the deployment and set up his forces trying to face both myself and Joe. Joe deployed aggressively towards Phoenix, while I spread myself out a little bit to counter whoever came at me first, but was more focused on Hack. Because, you know, he's a murderous bastard...

First turn, Phoenix won the Round Controller roll, of course. Aniel's good for that. In fact, he won every single Round Controller roll he rolled. Phoenix quickly discovered that Hack was Very Bad News (everyone discovers this their first game) and started trying to stop him. Hack charged forward and was gunning for the boys in suits. Meanwhile, I started moving my forces towards Hack and Amy, ignoring the GOD forces.

As the game progressed, Phoenix started losing men as soon as Hack got close. When Joe was in the bathroom, we agreed to ignore each other until Hack was dead. While Hack was tied up with the GOD forces, my forces started making their way to the middle of the board. Booth used his Ghost ability first turn and got in a good spot when Amy appeared and was able to move up, shoot her, and then run around a corner. While GOD tried to hold the line, they weren't able to get off too many shots. With Hack's ability to move forward an inch after killing another model, he was able to advance time after time and keep the slaughter going. Plus, those Bleed Tokens he produces were causing a lot of trouble for GOD.

In the middle of the board, Greygun and the Thugs were engaging in a back and forth with Amy and the other Thugs. Greygun managed to survive both molotovs. The other Thugs weren't so lucky. Booth was doing his best to be sneaky and caught Amy from behind, blasting her with some buckshot. That lead to his downfall when she hit back with some spells and dropped him. Greygun was also able to shot her but, only once. Instead, Greygun had to keep fending off Thugs with his blade. Somehow, he managed to keep ticking.

The course of the game changed when Aniel dropped. Without a reason to keep going, Phoenix reneged on our agreement and tried to attack Dante with his last Fist. Dante, however, is made of some stern stuff and finished him before he could do too much damage. The only problem was that it slowed Dante down and Hack was able to get away, turning towards Greygun.

A turn later, there were no more GOD forces on the table and one Thug left. The herd had been thinned down to Hack, Amy, the one Thug, facing off against Greygun, while Dante raced to catch up... While waiting for Dante, Greygun was able to drop the Thug and  survive an attack from Amy, as Hack came charging forwards.

In the end, it all came down to one last roll: Hack was barreling down on Greygun and I won Round Controller. The first shot missed, the second shot did crap damage. One last shot.... And five damage. Finally, after more than a few games and so many tries, Hack was dead.

And I won the game.

In the end, it was a game of many firsts. I had (FINALLY) managed to win a game and kill Hack to boot. I had also acquired some tokens, so I had stuff to use for activated minis, Bleed and Burn Tokens, and even had a few other colors to use for other effects that might have popped up. It was also the smoothest game I've ever played. I think we all had a good time, even if I was pissed off my Phoenix screwing me over at the last minute. I get that it's SpineSpur and shit like that happens, but I was going to be very angry if I had my victory snatched from me at the very last second due to this fuckery.

Here's what the causalities looked like at the end of the game:

GOD: 5/5 models killed
Hack & Amy: 5/6 models killed
Greygun's Angels: 4/6 models killed

Victory for Greygun's Angels!


 I really liked playing this list again. I think I'm going to keep using it (provided I get another game in, which I'm working on), it was a lot of fun and was easier to keep track of compared to the Dark Faith lists I was playing. Phoenix admitted that he screwed up during deployment and not using Aniel's Tactician ability. But, he said he'd like to play again, so we'll see what happens. I hope to get in a few more games before too long.

And this gave me a push to start working on my minis again. Soon, the Hack & Amy list will become the Cerebeast & Amy list... As the Institution is "coming soon."

Tuesday, January 28, 2014

Spinespur: Monday Night Massacre!

I finally got in a game of good old Spinespur last night. I got slaughtered, but that's no surprise for you regular readers...

It was a 100 point game using the Survival scenario. As Jay and I are still trying to remember all rules and it had been a while since we last played, we didn't use any Region rules. Soon as we feel comfortable with the basics again, that will be the time to add in all those great rules. Anyway, lets keep going!

The forces -
GOD: (played by Jay)
Aniel
Warriors of GOD (x2)
Fists of GOD (x2)

The Not-Really-Bad-Guys: (played by your friend, Captain Pete)
Greygun
Dante Hayte
Booth
Thugs with short blades (x3) [Bill, Adam and Thugi]

The GOD forces, being led by Aniel won the roll for deployment and promptly screwed me by deploying in the middle of the board. I ended up having to split my guys in to two groups: Greygun and the Thugs in one corner and Dante and Booth in the other. In hindsight, I should have tried to cram everyone into the one corner instead of trying to pull off some half-assed flanking move. The rest of the GOD forces deployed in a line along the middle of the board, dividing my forces and making me have to run the gauntlet.

In the first turn, the forces of GOD moved into position and took some shots at the Thugs while Greygun tried to get in a good spot to rain down some pistol rounds into the Suits. Booth Ghosted his way up to the top of a tower, trying to see if he could also join the fray from high ground, but everyone was out of sight. Meanwhile, Dante started rushing towards the skirmish line of GOD forces, hoping to Strangle a few that got in his way.

During the second turn, I lost the game. All three of my Thugs were put down one after another without getting a chance to do any damage. While the forces of GOD started to re-focus on Dante and Booth, they were out of combat range.

The moment Captain Pete realized he was going to lose


As the game continued for the next few rounds, Dante's Rockhard ability couldn't put up with the damage the Suits were putting out, Booth got cut off and gunned down (but was able to unload his double barrel right in Aniel's face) and Greygun was too far away to provide any kind of support. Dante was able to take out a Fist before he dropped, preventing a perfect victory for GOD. After seeing his entire team fall, Greygun got the hell out of Dodge.

The body count:
GOD - 5 kills
The Other Guys - 1 kill.

Victory for the Men of G.O.D.!
(again...)

As always, I lost. But, I also learned some things about the game. GOD is really hard to beat sometimes, especially when they dictate the terms of deployment. In addition to my mistake in deployment, I also wasted my first turn. I really did like my list, so I'll be using it again. I need to play more and really get use to my team and how they operate. I was screwed by the lack of Hindering terrain (Pano doesn't have any at his store, a situation Jay and I have resolved to fix soon), so I couldn't use Booth's Trapper ability as I had planned. Such is life.
I also noticed this game went much faster than the last few I've played, as Jay and I have gotten many of the basic rules down. We did have to look up some rules we hadn't used before (Rockhard and the fact Dante has it at 3+).

I want to give a shout-out to LXG, as I stole the idea for the name of this entry from them. You guys need to get some more games in, too! My goal is to get in a game of Spinespur each month, so be ready for a Monthly Monday Night Massacre!

See you next time!

Sunday, July 7, 2013

SpineSpur: Big Battle

Today, and yesterday, I got in some SpineSpur games. As the first one was short, I'm not going to bother re-capping it. Let's just say when you play 3-player game, it sucks to be the one the other two players gang-up on...

Anyway, today I played a 155 point game with my buddy Linus. The game was a simple Survival mission, with no special rules (We're both still learning, so I'm trying to keep things simple).

Hack & co: 154 points
Hack
Billy Burns
Amy Brighteyes
Sex Star Six
Molotov Thug (Tim)
Bludgeoning Thugs (x2 - Steve, Tony)

Dark Faith: 155
Anti-Pope
Cardinal Anhelitus
Cardinal Inferni
Sisters (x2)
Torn (x4)
Molotov Thug (Tom)

[Sadly, I have no pictures]

I won deployment, and started setting up on the hill at one end of the board, while Linus started to hide his forces in cover behind a building. I ended up with a line of Torn around the edge of the hill, with the Cardinals and Sisters as back up, while the Linus kept putting his people as far away as possible. To counter this, I stashed the Anti-Pope and Tom beside the hill, so they could cut off any flankers and be the second wave of my attack (after the main force had taken or caused causalities). His hiding threw off my attack plan of playing defensively, so I knew this was going to be a tough one...

The first turn, Billy, Amy, Tim and Six started climbing the building, get on to balconies and other spots, while my wall of undead lurched forwards. I also experimented with the Cardinals' abilities, using "Virulence" for the first time, and Grimnore to save Fear Tokens and Actions. Meanwhile, Hack and his Thug buddies tried to reposition themselves out of my way with a small flanking maneuver. The Anti-Pope and his buddy began moving towards the action ever so slowly.

Over the next few turns, combat started happening, with my Sisters dropping Steve, the bastard with a bat, using their throwing knives; then my wave of Torn crashed against the rock that is Hack. The battle raged, with Amy using "Dance with me!" a few times against my Torn, killing one of them with their own teeth, while Billy and Six watching and shrugging (I assume Six was teaching Billy how to play the guitar... Or stopping Billy from using his flamethrower). Cardinal Anhelitus was the first to fall on my side, biting the dust to Hack. He wasn't alone in death, as a Torn was taken down shortly there after. Meanwhile, the Anti-Pope kept edging his way closer and closer, eying the corpses on the ground and plotting...

As things started to heat up, I finally used the Dark Faith Agenda ability, allowing the Anti-Pope to pop a corpse and raise another one to fight again. I also used Inferni's spell to make my Torn stand back up, keeping them in the fight a little longer. About this time, Six dropped down from his perch and started wailing on his guitar, doing some damage to Inferni. The Sisters played it safe, with one of them grabbing the knives that had taken down Steve, then ducking into some near-by woods. Soon, the Anti-Pope got into range and the former Torn served their master a final time by exploding on command. Later on, Six made the mistake of trying to lay some heavy riffs on the Anti-Pope, but he quickly learned that the Pope doesn't allow just anyone to cast spells on him.

As the game closed, I lost another Torn to Hack, and tossed the Sisters' last blades into Hack's huge back. My Molotov Thug tossed his IED, but fell shortly there after to Six's music.

Final Score (total enemies killed):
Hack & Co. - 5 (including Torn born from a corpse)
Dark Faith - 1

Yeah, Hack is a total monster on the board. I was able to get him down to his last 10 Health, but we ran out of time before I could get the Sisters in range to beat on him. I also had the "Amy/Billy/Six" bubble to avoid, because they were all holed up in the one building. I also lost Anhelitus very early in the game, losing my main Torn booster, and I placed the Anti-Pope too far out. On the other hand, at least he made it to the end of the game this time.

If I could do it again, I would have forced the enemy to come to me and centered all of my forces on the hill. If I have to advance, I need to work on my 'waves.' Torn in the front rank, Sisters following to provide long-ranged support, followed by the Cardinals and the Pope, with my Thug acting as rear-guard. Lessons learned... Once I get the rest of my Thugs finished, I'm going to try going for my of them and using Curse of Undeath to bolster my ranks.

(I also need to figure out how to take Hack down. I haven't killed the guy yet!)

Saturday, May 25, 2013

SpineSpur Battle Report: 3-way Clusterf*ck

Howdy there, everyone! After a delay of a few weeks, I finally got a SpineSpur game in, and it was a nasty, bloody mess. Just like every SpineSpur game should be!

Mission: Kill the Head
Region: Shitlands
Optional rules: None

As this was my first game of SpineSpur and I was teaching the game to two of my gaming group, I tried to keep it pretty simple, which meant only 100 points. I had put together a half-assed "Sewer" board made with Dollar Tree foamcore and a pen. The good news is it cost $6 (including the knife I picked up to cut the foam with), but because the foamcore wasn't cut straight when I bought it, it looks a bit wonky.

Forces:

GOD - 100
Aniel
Warriors (x2)
Fists (x2)

Dark Faith - 100
Anti-Pope
Sisters (x2)
Torn (x3)
Thug: Molotov

"Kitchen Sink" - 99
Billy Burns
Hack
Thugs: Bludgeoning (x2)
Thug: Molotov

As you can see, I took each list in a different direction but made sure I could play any of them. As I am a (fairly) nice guy, I let people pick which list they wanted to play and ended up with the Dark Faith list. I was wary of using the Anti-Pope in such a small battle, but I wanted to use my painted models, and only Billy wasn't painted. It was really great to see all of the models I'd spent many hours working on in action. Sadly, the Anti-Pope's staff snapped off when I was taking him out of my figure case (from the Reaper Bones Kickstarter). I knew it was going to happen, it just ended up being today.

Deployment:
Jay, the person playing the GOD force won the roll for deployment and started by scattering his men around, while Linus, playing the Kitchen Sink force, deployed in a corner. That forced me to split my forces, sending a small group down the back corridor to either slow down Hack or come around from the rear of the big fight I was expecting.


The Battle:
I'm not going to go into a turn-by-turn report, but instead just sum up how things progressed. Jay and Linus played things cautiously, with the GOD force trying to consolidate into a cohesive force, while the Thugs and Hack looked around for something to kill. The Thugs made a bad call when they when after my Sisters, who promptly took one down by teaming up on him, which was followed by the Anti-Pope making him another undead minion. When that happened, all hell broke loose. The forces of GOD and Billy's goons realized that the dude in the funny hat was Very Bad News, and set aside their differences to bash his face in. In short order, I lost my Sisters, just about every Torn I had (including two I raised) and was trapped between Hack and a hard place... I mean, Hack and a Fist of GOD. I had ended up culling the soul of one of the Sisters, as she was down to one Health and the Anti-Pope needed to protect himself from the assault. In was alright in the end, as she rose again as a Torn, and did some damage to Hack. The best moment in the game for me came when a Thug foolishly stopped on top of a Torn corpse. Being of no use for the feared Curse of Undeath, it was time to blow something up! The Anti-Pope's Exploding Dead Guy of Doom was also close enough to damage Hack... For pathetic 3 damage.


Eventually, the Anti-Pope couldn't keep dodging and ended up torn apart by Hack's chainsaw. Now, I got to sit back and watch the former allies turn on one another, while my few surviving Torn and lone Molotov Thug made their way through the long, lonely corridor. Shortly after they arrived on the scene, they were cut down, too. Soon, the forces of GOD were firing at anyone they could see, and the Fist who had worked with Hack to beat the Anti-Pope now changed the maniac and punched his mask off. Soon, it was just little Billy Burns and all of the GOD men left. After a swift battle, during which Aniel's men finally took the first and only loss of the game to Billy's Inferno Tantrum, the sweet pure evil little boy was mercilessly murdered.


Victory: Men of GOD!

Lessons learned -
1. Never let the Anti-Pope get separated from the rest of the force, even if that means falling back
2. Don't split your forces
3. Never underestimate a little kid with the power to set you on fire with his mind

 I had a lot of fun playing the game, even if I lost. In fact, I had more fun playing this game than I ever did playing 40k.

If things go right, I'll be getting in another game next weekend. Hopefully, with a few changes in the list and maybe even with another player for a 4-way clusterfuck!

Friday, July 22, 2011

Coppa Boyz: Round One Summary!

Welcome to our first tournament review! We have been trying to get together for a while, and one of our friends, Shade, had recently started playing Necrons. We thought this would be a good way to teach him the rules and get some games in. Sadly, Blabbadon wasn’t able to attend. Perhaps next time he can and we’ll have more games to play.

Army Lists:

Tau:
Our Tau player, Pano, brought three squads of Fire Warriors, two 6-mans and one ten man. He also brought a Crisis Team and a Crisis Suit Commander.

Nercons:
The newest player, Shade, wasn’t able to bring much. Two 11-man squads of Necron Warriors and two units of Scarab Swarms.

Chaos Space Marines:
Remi brought a small force this time around, 9-man Khorne Berserker squad, a 5-man Chaos Marine squad and a Chaos Lord.

Imperial Guard:
I’ve been trying to work on a horde list for my Guard, this is what I ended up with. An Infantry Platoon with five squads, with a commissar, plus command squad, and an armored Sentinel.

GAME ONE: TAU VERSUS IMPERIAL GUARD
I admit I was worried to take on Panoption’s blue little bastards. He’s a good player, and I have terrible luck. This time, it appears the tables were turned. I deployed a blob with my commissar, and put the Autocannon squads in cover. The command squad was tucked behind the blob, ready to issue orders. The Tau only deployed the two small Fire Warrior squads and hid them in some ruins. As the game progressed, the blob slowly moved forward with assistance in the form of ‘Move! Move! Move!’ from the command squad. The blob ended up on the Tau end of the board, and engaged the larger Fire Warrior squad once it had arrived from reserves. The Crisis Team ended up deep striking in the middle of the table and was fired upon by just about everything that could get line-of-sight. It didn’t last long. The Crisis Commander ended up scattering off the table, to die from deep strike mishap. The blob was eventually brought down to just the commissar, who ended up running away. (He was later executed for this cowardly act.) The command squad ended up taking a few hits as well. After the dust cleared, the Imperial Guard controlled two objectives, while the Tau only had one. Win to the Guard.
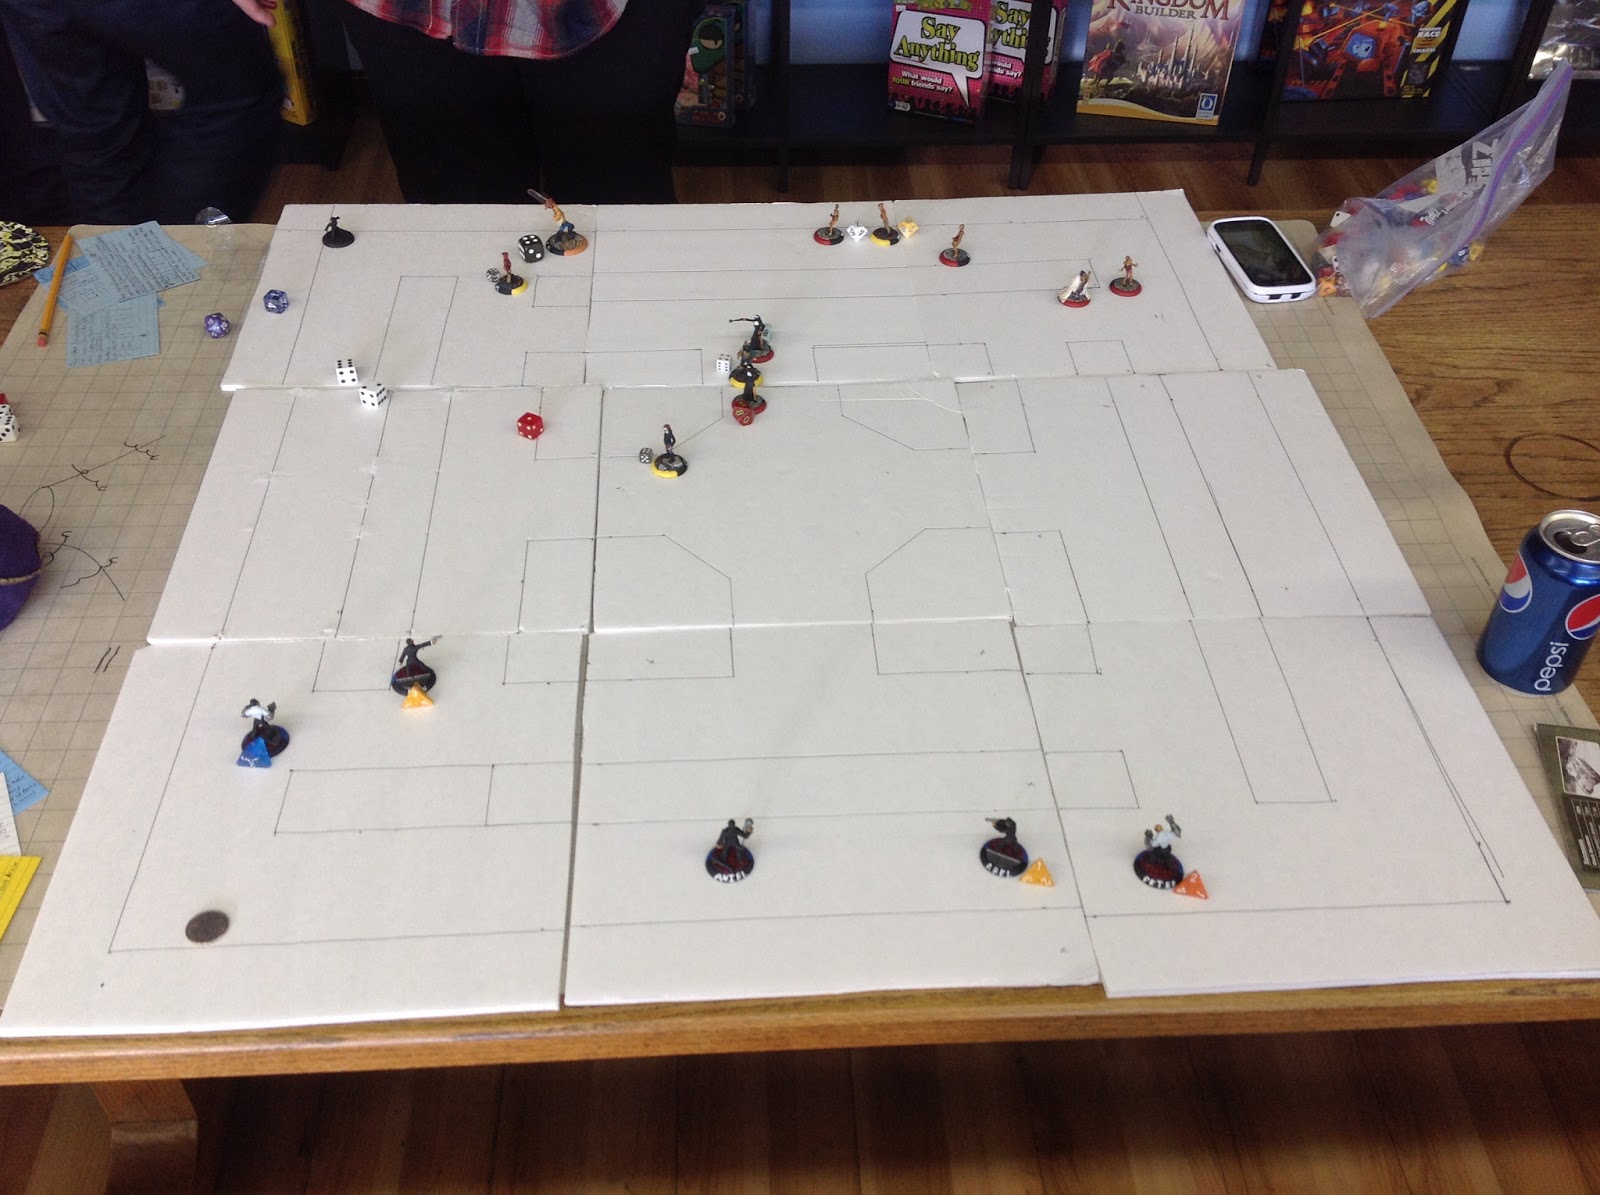
(PICTURES)

GAME TWO: CHAOS SPACE MARINES VERSUS NECRONS
Both players of this game didn’t have a lot of experience, so this game was one of the longest. Remigious’ Chaos forces tried to charge Shade’s Necrons, who had deployed in a bubble. The Scarab Swarms ended up engaging the Chaos Marines and the Berserkers in close combat, tying up both squads. One unit of Warriors ended up trapped in close combat with the Berserkers, making a headache of multi unit assault for all involved. The rhino, after dropping off the Berserkers, moved up to the second squad of Warriors, plinking away with its Havoc Launcher, its only surviving weapon. With the game deadlocked, the Chaos commander was given a flash of insight, and ended up Tank Shocking the unengaged Warriors. They passed their leadership, but choose not to try shooting the tank. It ended up behind them, and almost on top of the objective they were holding. What would have been a tie was now a victory for Chaos.

(PICTURES)

GAME THREE: IMPERIAL GUARD VERSUS NECRONS
I have to admit, I was curious to see what would happen when I faced Necrons, having never had this chance before. It was interesting, to say the least. The Necrons deployed in their bubbles, to discourage use to the Plasma Cannon the armored Sentinel was lugging around. This tactic worked, to a degree. The blob once again ran out into the fray, after deploying in the back. They managed to slag one Warrior with a melta gun, before being counter-assaulted by one of the Scarab units. This speed bump slowed them down, but not for long. Meanwhile, the other Scarabs had locked the Sentinel in close combat, denying the Plasma Cannon a chance to fire. By the end of the game, the little robot beetles had torn the thing off, making the combat pointless for them. The blob engaged one of the Warrior units, where they remained until the end of the game. During all this, the Guard squads traded fire with the unengaged unit of Warriors, with neither side gaining an edge. But, in the end, the Guard controlled two objectives, the Necrons one, and another contested by the bloody hand-to-hand fighting. The Guard were on a roll.

(PICTURES)

GAME FOUR: TAU VERSUS CHAOS SPACE MARINES
Panoption learned his lesson about deep striking from his earlier game with me, and deployed his forces in a firing line. Remigious’ troops had no choice but to duck for cover or rush him. They did both. The rhino charged forward, while the smaller squad hung back in cover, hoping the Tau wouldn’t notice them. This didn’t work. The Tau put out a withering amount of fire, from pulse rifles and plasma weapons. The forces of Chaos put up a brave fight, but in the end, couldn’t tolerate that much fire power. They lost both squads and all of the objectives. The Tau had avenged their earlier defeat.

(PICTURES)

There was a week break between the first four games and the last ones. The first four had taken so long, we ended up having to wait until we could get back together to finish off the round. But now, there was a lot riding on the final two games of the round. Remi and Pano were tied, one win and one loss apiece. If Shade’s Necrons could pull of a win, there would have to be one last battle, to see who went home. It was also during this week that I realized my army list was 520 points, not 500… Oops.
(Of course, I had my own worries. I had easily taken my first two challengers, but that only made my last one try all the harder. Remi needed a win badly, to have a chance to advance.)

GAME FIVE: IMPERIAL GUARD VERSUS CHAOS SPACE MARINES
This was a game that would shape the next round, so I made sure to give it my all. As did Remi. The Chaos forces deployed in their usual fashion, with a unit of Berzerkers in the rhino with the Lord and the smaller unit of Chaos Marines set up a distance away. On the first turn, the rhino met a firery end, forcing the Khorne-lovers to hoof it across the board. The unit of Chaos Marines also made their way towards the gunline. The Guard had been set up with the 30-man unit to one side, and the Autocannon units on another, with the command squad lurking behind them. As the Chaos forces advanced, they shrugged off a huge amount of fire. They also took out the Sentinel and the Autocannon units. The smaller unit of Chaos Marines assaulted the larger unit of Guardsmen, during which another sarge met the business end of the Commissar’s bolt pistol. The Marines were eventually put down, and along with the command squad, brought down the last few Berzerkers in a hail of plasma and melta shots at the top of turn six. Victory for the Imperium, having tabled the dread forces of Chaos.

(PICTURES)

GAME SIX: NECRONS VERUS TAU
Meanwhile, the Tau had another shooting battle going on. The Necrons stood up to the Tau’s fire, getting up time after time to continue the battle. The Tau were able to eliminate a unit of Scarabs, which ended up being a major error later on. The battle raged, with both sides exchanging fire from across the board. The Shade was able to out-fox Pano, and with the help of ending the game at the end of turn five, held two objectives to Pano’s one. Victory to the Necrons.

GAME SEVEN: NERCONS VERSUS CHAOS SPACE MARINES
Well, as I feared, the games weren’t over yet. With Shade’s win, he had tied with Remigious, and we had to have one last battle to see who would advance to the next round. Chaos played it smart, and hid the rhino when she could. The Necrons poured out fire whenever they could get line-of-sight. For some reason, the Berzerkers ditched their ride early on, and had to rush the Necron gunline. They finally got place, and ended up taking down a unit of Warriors in a vicious brawl. The rhino managed to make it to one of the objectives, to contest it. The unit of Chaos Marines held their ground, and objective through out the battle, and the Berzerkers, after wiping the Warriors, held another. The surviving unit of Warriors held an objective, but it just wasn’t enough. Chaos carried the battle and made it into round two.

Well, since I had made a mistake in the scoring, it turned out Shade, Remigious and Panoption were all tied for 2nd place. There was a final battle between Pano and Shade...

GAME EIGHT: NECRONS VERSUS TAU
(to be filled it later)

I was sad to Shade go. He just started playing, but he was hampered by his older codex. He did put up quite a fight and our game was a close one. I think he’ll be ready to win during the next tournament we run. Call it a hunch…

Well, there you have it folks. Necrons placed fourth and were out of the running. Remigious’ Chaos Space Marines managed to get in enough wins to squeak on in. Panopticon’s Tau suffered from some bad luck, but did fairly well. As for me, well, I got a clean sweep. I don’t know how I managed to do it, but I cleaned everyone’s clocks. I have a hunch I may not make it to the finals, but I’m just happy to make it this far.
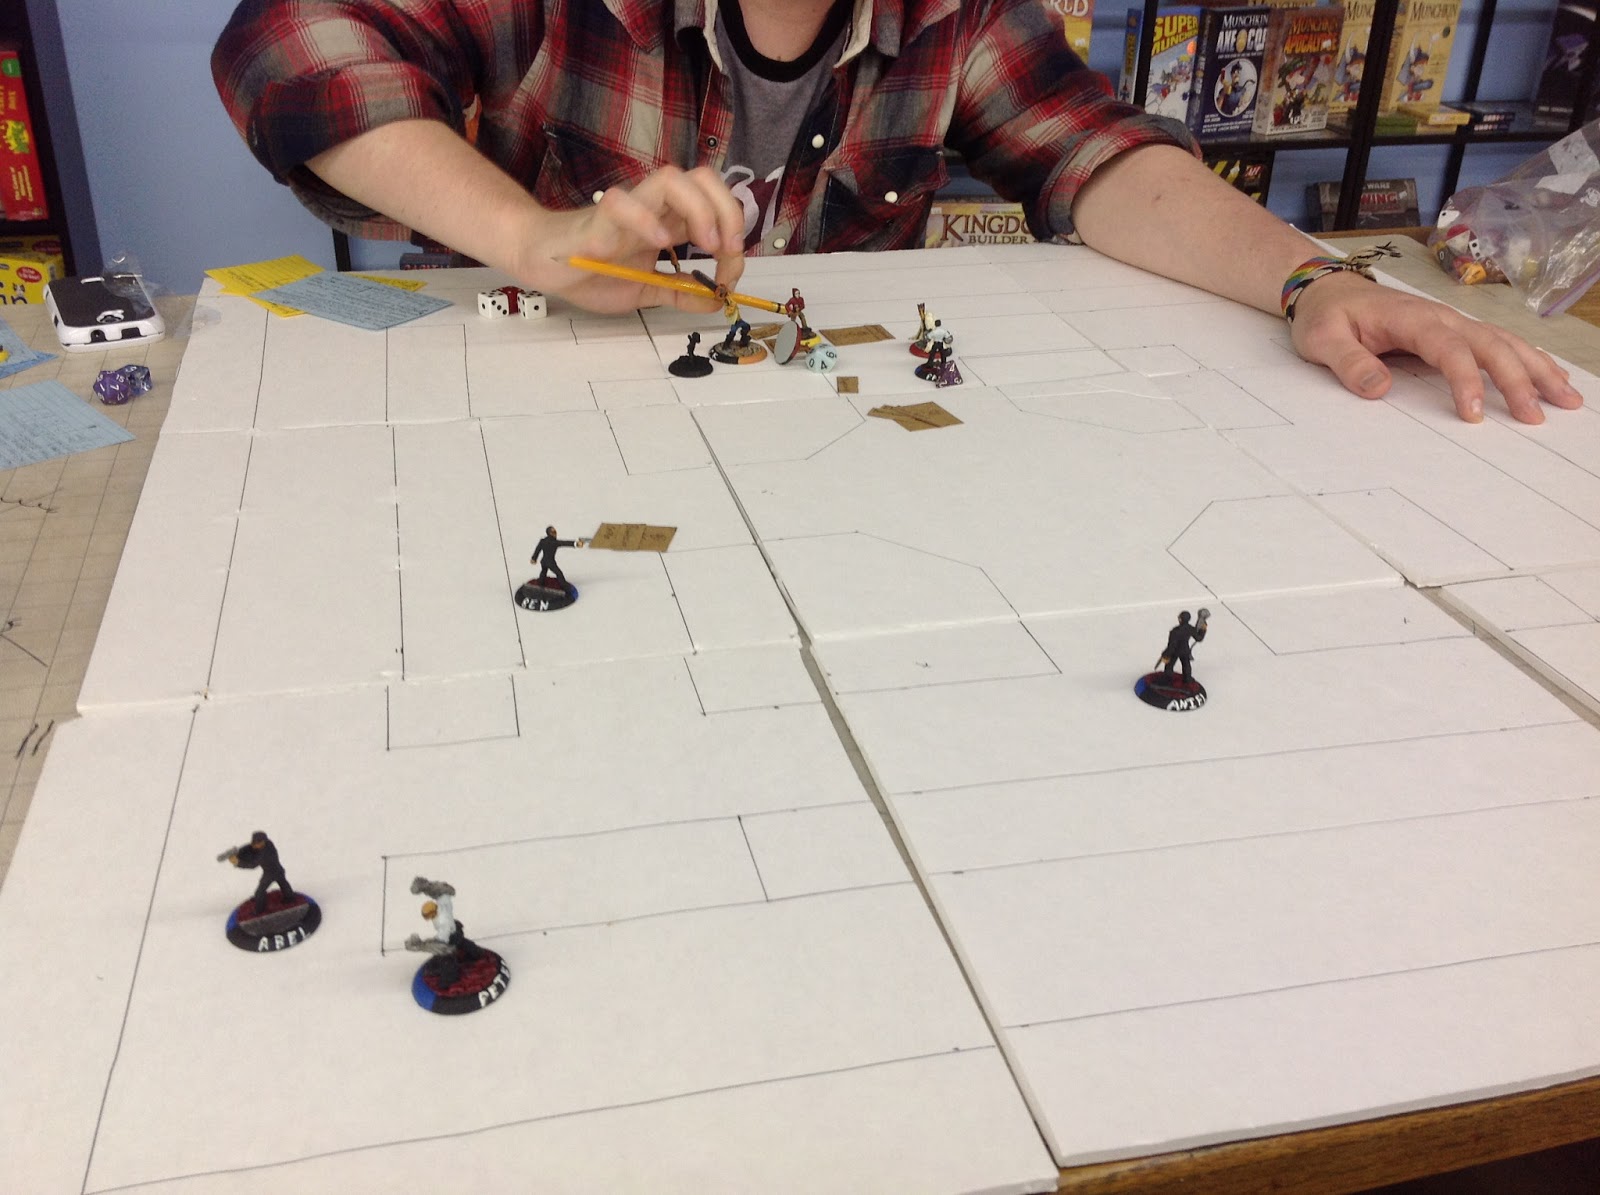
Scoring:
Imperial Guard: 3 wins
Tau: 2 wins, 1 loss
Chaos Space Marines: 2 wins, 2 losses (including final game)
Necrons: 1 win, 3 losses (including final game)

Until time, readers. Round Two: CITIES OF DEATH!

Thursday, July 21, 2011

Round One

Had the first round of our little tourney conclude this past Monday, so I figured I'd post something about it, this will not be a turn by turn commentary, rather a brief overview of the fights, who won and where I think they went wrong/right. There are some who might say that I played Dead Space 2 instead of paying attention to the fights I wasn't involved with, to them I say feh! In my domain few things are hidden from my sight! Don't underestimate me or I will boil your organs with my wierding module!.

Round 1: Tau (Panopticon) Vs IG(Captain Pete)
Tau list:
Shas'el with AFP and stuff
3x crisis suits with TL plasma
2x6 fire warriors
1x12 fire warriors

IG list: (Corrected by Pete)
Command squad with vox, medic, 2x plasma
30 man blob with 3x melta, commisar, vox
2x10 ig with AC
Armored Sentinel with PC (Later changed to Autocannon)

Pitched battle, 5 objectives
This ended in a loss for the Tau, his AC squads sat on objectives and didn't contribute much while his blob ran upfield, I was unable to get enough firepower into it to break it before they killed a 6 man squad and my crisis team. made the mistake of taking a couple potshots at the Sentinel and had reserved my suits so I was relying pretty much entirely on fire warriors to do the job, then the commander mishaped to death. His Sentinel spent most of the game in a fruitless for both sides assault contesting one of my objectives. Still coulda gotten a draw on objectives but was unable to get enough shots into one of his holders to force morale.

On the other board we had Chaos(Remigious) Vs Necrons(Shade)
Chaos list:
Chaos lord with P fist and plasma pistol (attached to the zerkers)
1x9 berserkers with plasma pistol (rides in Rhino)
1x5 chaos marines, no upgrades
Rhino, havoc launcher and daemonic possession

Necron list:
2x10 warriors
2x3 scarab swarms, disruption fields

This game was won by Chaos and pretty much was a big cluster assault in the middle of the board involving one warrior squad, the zerkers, and the scarabs. Probably would have gone faster if Remigious had put more attacks on the scarabs to max fearless wounds in the fights as she never lost combat, but as it was Shade survived the first round and the durable Necrons warriors tied things up for most of the game, Chaos managed to own and contest more objectives though.

Tau(Pano) Vs Chaos(Rem)
Another objective mission, this one basically involved me shooting her off the board as she walked up, I lost a fire warrior and a crisis suit, she had her 5 man chaos marine squad left.

Necron(Shade) Vs IG(CP)

To be honest, didn't follow this one that closely, but I believe it sorta mirrored my match above, the IG just shot things up and the blob tied things down enough that IG could get more objectives.

Tau(Pano) Vs Necron(Shade)
This is one where I totally was winning handily, then lost entirely due to my own mistakes and Shades good target priority. I shot the scarabs off the table in round 2, without those to threaten my firebase I was then able to wipe an entire warrior squad, unfortunately he was able to conga line that squad to control two objectives and my dice utterly failed me in the lat few rounds of shooting, still would have been an objective tie and I would have won on KP except I neglected to cover a reduced squad of warriors in the bottom of turn 6 and he was able to shoot them off the objective and win 2 to 1. I got all concerned with protecting my suits that I forgot entirely that the point of the game was objectives.

Chaos(Rem) Vs IG(Pete)

Rem's ongoing terrible luck with vehicles struck early here as her Rhino got immobilized at the first shot on the top of round 1, having to footslog across the board left her weakened to much to carry the assault against IG, and the lord/zerker deathstar was tied up for 2 rounds by the Sentinel, game ended with a tabling as it took too long to get anywhere and 15 models just can't take that punishment for that long.

Chaos(Rem) Vs Necron(Shade)
This was a tie breaker for going into the 2nd round, I dunno how Pete was doing his scoring but these two had to play off. (Pete says: At this point, Shade and Remigious had two losses and one win each, making a tie.)
Rem learned from her previous games and was able to get some good assaults in without having to wade against a river of fire, as well as a good tank shock to contest an objective with an empty Rhino. Shade was not as aggressive with his Scarabs as he could have been and that may have cost him a tie at the end being unable to contest objectives, Chaos wins it 1 to nothing

Final thoughts:
Tau: My list kinda blew and I lost my first game in the deployment phase, at this point level and on this small of a board I don't really need to have deep striking reserves, also my loss against the Necrons was a pretty huge mistake, reinforces the need to cover objectives though. Gonna switch it up a bit in the next round.

IG: Played pretty well, I always think his list building is schizophrenic though, if you are going to have an assault blob then tool it up for assault I say. Get some power weapons on the sergeants already. He was over by 20 points as he did bad math as well, but that 20 points was in the Sentinel Plasma Cannon and it did very little in any game so I forgive him. (Pete says: My list building is a byproduct from my learning process. The goal of the blob was to tie up shooting squads for several turns, and the Autocannon teams were there to hold objectives, while offering some ranged support to the army.)

Chaos: Rem is still getting into the aggressive mindset needed to run berserkers, she likes to shoot with the Rhino when most of the time it might be better to just move 12" the list was perfectly decent for this level, though I would pull the plasma off the zerkers and the havoc off the Rhino and either buy more dudes or give the CM squad a plasma gun or ML or something.

Necron: Shade is a brand new player and brought his entire model collection to the fight, he did well using the old codex, though again could have been more aggressive with his Scarabs, they move as jet bikes and he didn't take as much advantage of that as he could have. However he made no real other mistakes and good decisions about what to shoot at most of the rest of the time.

Wednesday, March 3, 2010

battle rep time


Shas'el Maen'go listened to the Kroot grumble as the expeditionary force made their way through the overgrown ruins of what must have been a village before time and abandonment had their way with it. "Why are we exploring the world? There is nothing to fight here" One said to another in their odd language of clicks and screeches.
"Because we are upholding our end of a bargain." Responded the battlesuit commander. "The Eldar have lent us certain items and books that gave our researchers much insight into the nature of what the humans call Chaos and the Warp. But these materials must be returned. Somewhere in this sector there are a cluster of Webway gates that open a route to the Eldars Black Library, we must journey there and return these items. The Farseer who lent them mentioned something about "terrible fines" if we do not."
"We are here to ensure the Webway portals remain unused by those not authorized." As he spoke the expeditionary force crossed a hill and came in sight of their objective, a cluster of 4 distinctive Wraithbone structures stood surrounded by ruins and forested patches, of greater interest were the other beings here, charging for the portals from all directions were a mixture of tanks and foot soldiers, human foot soldiers.
"Arm weapons! Pathfinders forward! We must drive them back at once for the Greater Good!

The battle to Return the Books to the Black Library had begun.
This was a 4 way 750 point battle using the army lists posted earlier. 4 objectives with kill points used as a tie breaker. We are all relatively new to the game so kinda made stuff up as we went so far as having a 4 way game. We rolled initiative anew after each cycle of turns so the play by play will be a bit odd looking.

Due to the objective layout, the fight turned into more of a pair of 1v1 matches than anything else, Tau fought Chaos, and IG fought Space Marines, I (Tau) took a few potshots at IG as well but was usually too far away from SM to do anything.

I deployed everything except the suits which I held in reserve for deep striking. Kroot squad went right on the objective, which was smack in the middle of a nice thick piece of forest terrain, they would remain there all game, Fire Warrior squad occupied another bit of terrain nearby and the space in between was occupied by the Devilfish, had Pathfinders a little bit behind the FW if I recall, Hammerhead deployed as far away as I could from anyone, there was no LOS blocking terrain so it didn't matter much where it ended up.


Chaos deployed at the objective nearest mine, which was in a corner, DP towards middle of board, Vindicators on the sides and rhinos between them, there was a good bit of cover there so maneuverability was kinda gimped, which saved my butt.

IG deployed in a sorta gunline on the table edge, command chimera close to the corner, the Leman Russ, objective, Leman Russ, and Armored Sentinel a little more towards the middle of table


SM deployed opposite IG, combat squadded the 10 man squad and loaded up the 8 man with Captain in a Rhino, the Dreads deployed forward where they could attempt to come to grips with the IG armor relatively quickly. the combat squadded SM deployed on either side of the objective.


Turn one
IG
Started things off with some pie plates, all shooting was mostly ineffective, killed one marine and shook the assault cannon dread

Chaos
Fired he own pie plates, Kroot went to ground but lost one, FW lost one but stayed standing up, there was no movement whatsoever, this was her biggest mistake and Cap'n Pete declared the DP a waste of money (he bought it as a present)

SM
Moved everyone except combat squads forward, firing immobilized the Sentinel, Hunter Killer fired but either missed or failed to Pen.

Tau
Pathfinders lit DP up, mass firing took 2 wounds off it, Hammerhead stunned a Vindicator but was ignored to to Demonic Possession.


Turn 2
Tau won this one, this time immobilizing rightmost Vindicator and wounding the DP again, one more to go, Commander and Stealth suits came in, Stealth Suits aiming for a fusion shot on the nearest Leman Russ, they scattered out of range. Commander came in between me and the SM deployment, and accomplished nothing.

Chaos, Some moving this time! due to terrain and the immobilized Vindi, there was only room to get one Rhino out, so she camped the other on her objective, DP moved up as well and stunned the Devilfish. Shooting killed another Kroot, another FW

IG, got a vet squad in I believe, which took up position at the objective, shooting shook a dread, the assault cannon one again I believe, and a battle cannon shot succeeded at spotting and hitting my Stealth Suits, they bit it.

SM
Everything moves forward again, in shooting the melta dread blew up the command chimera, they save versus pinning but subsequent shooting whittles the squad down to force a moral check, they fail and fall back 11 inches off the board, so much for orders.


Turn 3

Chaos
DP stops being interested in the Fish and tears into the Fire Warriors, killing 3, they predictably do nothing back but do pass their leadership, other shooting weapon destroys and immobilizes devilfish turning it into a piece of terrain for the rest of the game, as no interest was shown in killing it off.

IG
The remaining squad comes on and takes position next to the middle Leman Russ Tanks kill the Assault Cannon Dread, a battle cannon shot also scatters back and kills a guardsmen. Another SM dies in the back to Plasma or something.

SM
Melta dread Assaults nearest LR, wrecking it, this was bad actually as due to the terrain there is no quick way in to the objective for his infantry in the rhino. They unload and begin trudging over anyway, the Dread needs to move for this to work though. shooting kills a single quardsman.

Tau
Hammerhead wrecks a rhino, Kroot firing kills 2 of the squad that piled out, the DP finishes of the Fire Warriors.


Turn 4

SM
shooting kills a guardsmen, Dread assaults and kills another, nothing more.

IG
Leman Russ kills the remains of one of the combat squads on Blabbadons objective, Plasma from the sentinel kills 2 from the other. And an autocannon shot gets one more. Guardsmen immobilize Dread in combat, now there is no way in to the objective.

Tau
Burst cannon fire from the Hammerhead finishes the Demon Prince. Commander suit takes a shot at some guardsmen, killing 2

Chaos
Shooting kills one Kroot

Turn 5

Chaos
in shooting and assault manage to kill 3 total Kroot, they pass leadership and are locked

IG
Finish off the marines in the backfield, and kill one from the disembarked squad. Assault see weapon destroyed on the DCCW and one guard die.

Tau
Commander blows up unengaged Vet Squad, they fail lead and flee 11 inches off the board again. the Kroot/CSM fight kills one each, the drones off the devilfish join in for some reason but do nothing.

SM
Load up into the Rhino and book for their own objective, nothing happens in assault.

Turn 6

SM still gunning for the objective, they unload the squad and are just in reach to reclaim it, another guard dies to the dread.

IG, kill about half the marines with shooting, the Guard squad finally gets wiped out in assault

Tau, railguns Leman Russ, immobilizing it, yay. The assault draws with no wounds on either side.

Chaos, nothing happens, assault draws.

Turn 7
IG gun down 2 more marines, leaving only the captain, not being infantry he can only contest. his own objective now

Tau
Nada, all shots miss or are ignored by demonic possession, and assault draws.

Chaos, finally looses the last marine in combat, securing my objective

SM
Immobilized Dread meltas the sentinel.


So, end of game we have
Tau 1 objective, 4 KP
Chaos 1 objective, 1 KP
SM contested objective, 5 kp
IG no objective,(their holders died against the Dread and the Russ was the next closest unit, can't hold and outside 3 inches anyway) 5 KP


My end game thoughts:
I got lucky on my end with Chaos not moving on the first turn. Gave me a free turn of shooting at the DP and was the difference between me sorta winning or getting eaten and wiped off the board.

I still am experimenting with weapon loadout on my commander, the AFP was pretty darn lackluster, I think I'll just take a flamer if I require anti infantry in the future.

My Stealth Suits failed me hard, they literally scattered maybe 1/4 an inch too far back for me to shoot the tank, then failed miserably at living, I don't think I can run these without shield drones anymore

Chaos was way too cautious, not much more to say about that.

IG didn't have enough troops, but the big problem was the location of the Chimera at the beginning, it had no room to maneuver and was caught in a corner, with orders that fight may have gone dramatically different

SM were also not aggressive enough I think, I always figure even vanilla marines will tear apart guardsmen in assault so if you have a chance at it don't bother shooting and just charge in there. Hard to outshoot Guard anyway. Real bad luck with the immobilized dread though, if that didn't happen, or it exploded, they coulda got in and captured the IG objective with no trouble.

No more 4 way battles though, too damn long.